Maximising SEO With Robots.txt: The Ultimate Guide For Website Optimization
Is your website struggling to get enough traffic from search engines? Robots.txt files play a crucial role in optimising your site for search engine crawlers. In fact, a well-crafted robots.txt file can boost your site’s SEO by helping search engine spiders find and index your most important pages.
This guide will show you how to use robots.txt to maximise your site’s visibility and search rankings. Ready to unlock the power of robots.txt for your website?
Key Takeaways
- Open a text editor
- Specify the user – agent
- Use “Allow” and “Disallow” directives
- Add your XML sitemap location
- Save as “robots.txt” in your site’s root directory
- Test it using Google Search Console
- While robots.txt is a handy tool for SEO, it has some constraints. It can’t force indexing, influence rankings directly, or guarantee bots will follow the rules. It also has a size limit of 500KB. So use it wisely as part of a holistic SEO strategy.
Understanding Robots. txt and its Importance
Robots.txt is a crucial text file that websites use to communicate with web crawlers and search engine bots. It acts like a traffic controller, telling these automated visitors which pages they can access and which ones are off-limits – this helps optimise your site’s crawl budget and overall SEO performance.
What is a Robots.txt File?
Here are 2 short, concise and informative paragraphs about “What is a Robots.txt File?”:
A robots.txt file is a plain text document that sits in the root directory of a website. It acts as a guide for search engine web crawlers, like Googlebot, telling them which pages or sections of the site they can access and index.
The file uses the Robots Exclusion Protocol, a set of web standards that regulate how robots crawl the web, access and index content.
A robots.txt file is like a No Trespassing sign for search engines. – Matt Cutts, former head of Google’s web spam team.
Why Robots.txt Matters for SEO
Robots.txt files play a crucial role in optimising websites for search engines. They guide web crawlers, like Googlebots, on which pages to index and which to ignore. This helps allocate the crawl budget efficiently, ensuring that search engine spiders focus on the most important content.
By preventing the indexing of duplicate or non-public pages, robots.txt files help improve the quality of the search engine results pages (SERPs) and boost a site’s visibility.
Moreover, robots.txt files give website owners control over how search engines perceive their site. They can hide resources that don’t need to appear in search results, such as internal search pages or staging environments.
How Robots. txt Works
Robots.txt helps search engine bots understand which pages to crawl and index. It’s a small text file that lives in your website’s root directory, acting as a roadmap for web crawlers….
Optimising Crawl Budget
Optimising your website’s crawl budget is crucial for SEO success. Search engine spiders have a limited amount of time and resources to scan your site’s pages. By strategically using the robots.txt file, you can guide these web crawlers to prioritise indexing your most important content.
This ensures that your key webpages get discovered and ranked faster in Google search results.
Blocking duplicate or non-public pages in robots.txt helps conserve crawl budgets for your critical HTML documents. You can also use the crawl-delay directive to control the rate at which bots crawl your site, preventing them from overwhelming your server.
Hiding resource-heavy elements like PDFs and images further streamlines the crawling process. With a well-optimised crawl budget, you’ll maximise your site’s visibility in search engines and drive more organic traffic.
Blocking Duplicate and Non-Public Pages
Transitioning from optimising your crawl budget, another key function of the robots.txt file is blocking duplicate and non-public pages from being indexed by search engines. Pages like thank you pages, login pages, and internal search result pages are essential for your website’s functionality but don’t need to be crawled or indexed.
By using the disallow directive in your robots.txt, you can prevent these pages from appearing in search results and draining your crawl budget.
For instance, if you have a subdirectory called “/internal/” that contains non-public pages, you can block it by adding “Disallow: /internal/” to your robots.txt file. This tells web crawlers to skip indexing any pages within that directory, keeping them hidden from public view.
Hiding Resources
The robots.txt file is handy for keeping certain resources on your site hidden from search engine crawlers. This could include things like PDFs, videos, images, or other media files that you don’t necessarily want showing up in search results.
It’s a simple way to tell web robots, “Hey, don’t index this stuff!” … Just add a disallow directive for the file path or directory where those resources live, and voilà – they’ll be as good as invisible to Google and other search engines.
But wait, there’s more! You can also use the robots.txt file to block access to entire sections of your site. Maybe you have a staging area for testing new pages before they go live, or some old legacy content that’s no longer relevant.
Rather than letting search engines waste time crawling those areas, you can add a disallow directive to keep them out. It’s like putting up a “No Trespassing” sign for web crawlers …
Locating and Understanding Robots. txt Syntax
Finding your robots.txt file is usually straightforward – it’s located in the root directory of your website. Once you’ve found it, take a moment to familiarise yourself with the syntax and directives inside, which tell search engine spiders like Googlebot what they can and can’t crawl on your site.
Finding a Robots.txt File
Locating a website’s robots.txt file is a straightforward process. Just type the site’s domain name into your browser, followed by “/robots.txt”. For example, to find Google’s robots.txt, you’d enter “www.google.com/robots.txt”.
Boom – there it is! The file will pop right up in your browser window, ready for you to peruse.
The road to SEO success is paved with a well-crafted robots.txt file. – Anonymous
If the site doesn’t have a robots.txt, you’ll see a “404 Not Found” error instead. But don’t sweat it – that just means the site owner hasn’t created one. They might not feel it’s necessary, or maybe they’re not hip to the SEO game yet.
Interpreting the User-Agent Directive
After finding the robots.txt file, the next step is to understand the user-agent directive. This directive specifies which crawlers the rules apply to. It can be set to “User-agent: *”, which means all bots, or a specific bot like “User-agent: Googlebot”.
The asterisk (*) is a wildcard that represents any sequence of characters.
The user-agent directive is case-sensitive, so “Googlebot” and “googlebot” are treated differently. If you want the rules to apply to multiple bots, list each one on a separate line.
For example:.
User-agent: Googlebot
Understanding the Disallow and Allow Directives
The “Disallow” directive in a robots.txt file tells web crawlers which pages or sections of a website they shouldn’t access. It’s like putting up a “No Entry” sign for search engine bots.
On the flip side, the “Allow” directive is used to make exceptions within a disallowed directory – it’s like saying, “Okay, you can’t go into this room, but feel free to check out the closet!”.
So, when you’re putting together your robots.txt, you’ll want to use “Disallow” to keep search engines away from any pages you don’t want them snooping around in, like your secret blog drafts or that embarrassing photo gallery from last year’s office party.
The Role of the Sitemap Directive
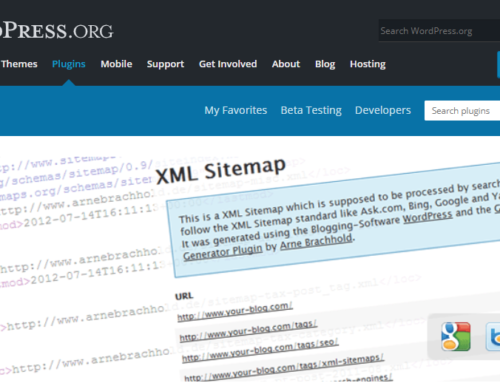
After specifying which pages to allow or block, the Sitemap directive plays a key role in your robots.txt file. This handy command points search engine spiders to your XML sitemap – a roadmap of all the important pages on your site.
Think of it like giving Google a VIP pass to your website’s hottest spots!
Your XML sitemap is like a secret map that helps search engines find and index your content more efficiently. It’s a file that lists all the URLs you want crawlers to visit, along with some extra info about each page – like how often it’s updated and how important it is compared to other pages.
Exploring the Crawl-Delay and Noindex Directives
Beyond the sitemap directive, robots.txt offers two other noteworthy instructions: crawl-delay and noindex. The crawl-delay directive tells search engine bots to pause between crawling pages on your site.
This helps manage server load and prevents overloading. However, Google no longer follows this directive, so it’s less useful these days.
The noindex directive might seem like a way to prevent pages from appearing in search results, but it doesn’t actually work that way. Robots.txt isn’t meant for controlling indexing – it only guides crawling.
Creating Robots. txt File
* Create a robots.txt file using a text editor like Notepad (for Windows) — just make sure to save it with the proper filename. Test your robots.txt file with an SEO tool to check for any errors or issues before uploading it to your website’s root directory.
Steps to Create a Robots.txt File
Creating a robots.txt file is surprisingly straightforward. Just follow these simple steps and you’ll have your website optimised for search engines in no time:
- Open a plain text editor like Notepad (Windows) or TextEdit (Mac). Avoid using word processors such as Microsoft Word, as they can introduce formatting that may cause issues.
- Start the file with “User-agent: *” to indicate these rules apply to all web crawlers. The asterisk acts as a wildcard representing any bot.
- On the next line, use “Disallow:” to specify which pages or directories you want to block. For example, “Disallow: /private/” would prevent bots from accessing the “/private/” directory and its subdirectories.
- If you want to allow crawling of a specific page within a disallowed directory, use “Allow:“. For instance, “Allow: /private/public.html” grants access to that particular page.
- To specify your sitemap’s location, add “Sitemap:” followed by the URL, like “Sitemap: https://www.example.com/sitemap.xml”. This helps search engines find and index your site’s content more efficiently.
- Save the file as “robots.txt” (all lowercase, without a filename extension) and upload it to your website’s root directory. This is typically the same location as your homepage (e.g., www.example.com/robots.txt).
- Test your robots.txt using Google Search Console’s Robot Tester tool. It’ll analyse the file and identify any errors or warnings, helping you ensure optimal performance.
Remember, while robots.txt is a powerful tool for managing crawler behaviour, it’s not a foolproof security measure. Sensitive information should always be protected through proper authentication and access controls… not just by hiding it from search engines!
Best Practices for Testing Your Robots.txt
Testing your robots.txt file is crucial to ensure it’s working as intended. Here are some best practices to follow:
- Use the robots.txt Tester in Google Search Console: This tool allows you to see how Google’s web crawler, Googlebot, interprets your robots.txt file. It highlights any errors or warnings, making it easy to identify and fix issues.
- Check for syntax errors: Even a small typo or misplaced character can render your robots.txt file ineffective. Use an online validator or text editor with syntax highlighting to catch any mistakes.
- Verify accessibility: Make sure your robots.txt file is located in the root directory of your website and can be accessed by search engine bots. You can test this by typing your domain name followed by “/robots.txt” in a web browser.
- Test different user agents: While Googlebot is the most common web crawler, there are others like Bingbot and Yandex. Test your robots.txt file with various user agents to ensure it’s working correctly for all search engines.
- Monitor crawl stats: Keep an eye on your website’s crawl stats in Google Search Console. If you notice a sudden drop in crawl rate after implementing changes to your robots.txt file, it could indicate an issue that needs to be addressed.
- Use the “Allow” directive sparingly: The “Allow” directive overrides the “Disallow” directive, so use it cautiously. If you want to allow access to a specific page or directory, it’s better to remove the “Disallow” rule altogether.
- Regularly review and update: As your website evolves, so should your robots.txt file. Regularly review and update it to ensure it reflects your current site structure and SEO goals.
By following these best practices, you can ensure your robots.txt file is optimised for search engine crawlers and contributes to your overall SEO strategy.
Moving on to implementing robots.txt best practices, there are several key considerations to keep in mind.
Implementing Robots. txt Best Practices
Implementing robots.txt best practices is crucial for optimising your website’s SEO. By utilising wildcards, adding comments, and managing separate files for subdomains, you can give clear instructions to search engine bots like Googlebot and Bingbot.
Utilising New Lines for Each Directive
Utilising new lines for each directive in your robots.txt file keeps things tidy and easy to read. Think of it like organising your closet – you want shirts in one pile, pants in another, and socks in their own little corner.
When you put each directive on its own line, it’s like giving every item its own designated spot. This way, when you or a web crawler takes a peek inside your robots.txt “closet,” everything is neatly arranged and simple to understand.
Separating directives with new lines also helps prevent mix-ups and misinterpretations. It’s kind of like when you’re writing out a shopping list – if you cram everything together in one jumbled paragraph, you might end up with “toothpaste, eggs, milk, bread, shampoo” all blending into one confusing mess.
But if you list each item on its own line, suddenly your shopping trip becomes a breeze. The same goes for your robots.txt file – by putting each directive on a new line, you ensure that search engine spiders can easily follow your instructions without getting their wires crossed.
Using Wildcards and ‘$’ to Clarify Directions
Wildcards and the ‘$’ symbol can do wonders for optimising your robots.txt file. The asterisk (*) wildcard matches any sequence of characters, while the dollar sign indicates the end of a URL.
For example, “Disallow: /private*” blocks all URLs starting with “/private”, and “Allow: /*.pdf$” permits crawling PDF files only.
Used strategically, these tools give you granular control over what search engine bots can access. You might disallow an entire directory but allow a specific file within it. Or block dynamic URLs with query strings but allow the base page.
Adding Comments with the Hash (#)
Using comments with the hash (#) symbol is a handy trick for adding clarity to your robots.txt file. It’s like leaving sticky notes for yourself or your team, explaining what each line does – without affecting how search engine bots read the file.
Just pop a ‘#’ at the start of a line, and jot down your thoughts, explanations, or reminders.
Comments are your secret weapon for keeping your robots.txt file organised and easy to understand. They let you break up sections, add context, and document your reasoning – all without cluttering up the actual directives.
Managing Separate Robots.txt Files for Different Subdomains
Having separate robots.txt files for different subdomains is crucial for providing clear instructions to search engines. Each subdomain should have its own robots.txt file placed in the root directory, carrying the filename robots.txt.
This organisation ensures that web crawlers can easily locate and interpret the directives specific to each subdomain.
When crafting the robots.txt file for a subdomain, it’s important to be as specific as possible in defining the Disallow directive. Multiple groups of directives for one search engine can lead to confusion, so clarity is key.
By following best practices like using new lines for each directive, wildcards, and comments, you can create a well-structured robots.txt file that optimises your website’s SEO performance.
The Limitations of Robots. txt
Remember that robots.txt only controls crawling behaviour, not indexing… It won’t stop a page from showing up in search results if other websites link to it. Robots.txt files also have size limits—keep yours under 500KB to avoid issues with Google’s crawler (Googlebot) reading it properly.
Understanding the Directives Contained in Robots.txt
The robots.txt file is a simple yet powerful tool for controlling how search engine bots interact with your website. It’s made up of one or more blocks, each specifying a user-agent and an allow/disallow instruction.
The user-agent identifies the web crawler, like Googlebot, while the allow and disallow directives tell it which pages to crawl and which to skip. You can use wildcards and the ‘$’ symbol to give more precise instructions.
The crawl-delay directive sets a pause between requests, and the sitemap directive points to your XML sitemap… though Google ignores this. Some SEO plugins like Yoast can help manage your robots.txt.
It’s crucial to know robots.txt’s limitations. It can’t force bots to index pages or influence rankings directly. The noindex directive isn’t supported by Google. And caching can lead to short delays before changes take effect.
Size is limited too – max 500KB. So while robots.txt is handy for managing crawler traffic, it’s just one piece of a broader SEO strategy. Things like quality content, fast load times and mobile-friendliness are key as well.
The Impact of Caching on Robots.txt
Caching can significantly impact how robots.txt files function on websites. When a robots.txt file is cached, web crawlers like Googlebot store a copy of the file instead of fetching it from the server each time they visit.
This caching process helps reduce server load and improves the overall performance of the website. However, it’s crucial to keep in mind that changes made to a cached robots.txt file may not take effect immediately, as crawlers will continue to use the cached version until it expires or is refreshed.
To ensure that updates to robots.txt directives are recognized promptly, website owners can use techniques like setting appropriate cache headers or implementing dynamic robots.txt files.
Size Limitations of Robots.txt
Robots.txt files have a size limit that can impact their effectiveness for search engine optimization. Google, for instance, will only cache and process the first 500 kibibytes (KiB) of a robots.txt file.
That’s about 250 pages of plain text… so while it might seem like a lot, it can be easy to exceed this limit if you’re not careful.
Exceeding the size limit means any directives after the cutoff point will be ignored by the web crawler. This can lead to important pages being unintentionally indexed or disallowed pages showing up in search results.
Conclusion
So there you have it – your ultimate guide to maximising SEO with robots.txt. It\’s a small file that packs a big punch when it comes to website optimisation… just make sure you use it wisely! Get your syntax right, follow best practices, and watch your site soar up those search engine rankings.
Happy optimising!
FAQs
1. What is a robots.txt file and how does it impact SEO?
A robots.txt file is like a set of rules for search engine crawlers, telling them which web pages they can or can’t access. It’s part of the robots exclusion standard that helps manage how Google and other search engines crawl your site, influencing your SEO and web page rankings.
2. How do I create a robots.txt file for my website?
Creating a robots.txt file is pretty straightforward – you can use a simple text editor or file management tool. Just make sure to save it in the root directory of your website with the name “robots.txt”. Oh, and don’t forget to specify the file path using the standard uniform resource locator (URL) format.
3. Can I use robots.txt to block specific directories or pages?
Absolutely! You can use the “Disallow” directive followed by the directory-name or specific URL you want to block. For example, “Disallow: /private/” would prevent crawlers from accessing any pages within the “/private/” directory. It’s a handy way to keep certain content out of search results pages.
4. What’s the difference between robots.txt and meta robots tags?
While robots.txt controls crawler access at a site-wide level, meta robots tags are used within the HTML code of individual pages. Tags like “noindex” or “nofollow” can be added to the
section to signal search engines not to index that specific page or follow its links. It’s a more granular approach to managing your SEO.
5. How can I test and optimise my robots.txt file?
There are plenty of handy SEO tools out there that can help you analyse and optimise your robots.txt file. They can flag any errors, conflicts, or opportunities for improvement. Plus, most search engines provide their own tools, like Google Search Console, to help you see how they’re interpreting your robots.txt directives.
6. What common mistakes should I avoid with robots.txt?
One big no-no is using robots.txt to hide pages you don’t want indexed, like duplicate content. It’s not a reliable method and can even backfire. Also, watch out for typos or syntax errors that could accidentally block important pages. And don’t forget to update your robots.txt file whenever you make significant changes to your site structure or URL paths.