If you regularly use WordPress, you may already be acquainted with various CMS-related errors, such as the white screen of death or connection errors. However, there are other errors that may occur related to your internet connection and DNS that may surprise you.
One of the common such DNS-related issues is the DNS_PROBE_FINISHED_NXDOMAIN error message. The error code can be scary at first, but it actually isn’t that difficult to resolve. Learn how you can resolve this error below.
What is DNS?
The DNS_PROBE_FINISHED_NXDOMAIN error message usually indicates a problem with your DNS. So, before we learn how to fix DNS PROBE FINISHED NXDOMAIN error code, you need to understand what DNS is.
Domain Name System, or DNS, helps direct traffic on the internet between various devices, browsers, resources, and servers by connecting domain names with web servers. In essence, DNS takes human-friendly requests, like a domain name, and translates them into IP addresses, which are more computer-friendly.
Without DNS, you would have had to remember IP addresses for the websites you want to visit instead of their domain names since computers cannot recognize domain names like they can recognize IP addresses.

How Does DNS Work?
The DNS resolution process is quite simple. During the DNS resolution process, the human-friendly domain name is converted into a computer-friendly IP address. Here’s an easy way to understand how DNS works.
Whenever you try to access a website on your browser, you type the web address in the search box, which is the domain name. When you do that, your browser sends a query to the local DNS cache in your computer to see if your site has been looked up in the past.
If your browser does not find any past DNS records in the cache, it then forwards the query to the local DNS server, which is usually your ISP’s server. If the local server does not have any records, the query is then forwarded to one of the root nameservers that are designed to store DNS records.
Once the query lands on a nameserver that contains the required DNS records, your computer quickly caches the information.
By doing so, your browser can now quickly establish a connection between itself and the website’s server. Essentially, the DNS records make it easier for your browser to locate and connect to the website server using its IP address.
To know more about DNS and how it works, we suggest you check out our article, What is DNS, and How Does It Work?

What is DNS_PROBE_FINISHED_NXDOMAIN?
Now, let’s take a look at DNS_PROBE_FINISHED_NXDOMAIN and what does it mean exactly. The most common reason why you see the DNS_PROBE_FINISHED_NXDOMAIN message in your browser is because of a problem with your DNS server. Thus, the error code denotes that there is an issue with your DNS query or DNS server.
The error message also appears differently, depending on the browser you are using. For instance, on Google Chrome, the code appears as “This site can’t be reached”; on Mozilla Firefox, it appears as “Hmm. We’re having trouble finding that site,”; and on Safari, it shows up as “Safari can’t find the server”.
What Causes the DNS_PROBE_FINISHED_NXDOMAIN Error?
When you enter a URL into your web browser, the DNS (or Domain Name System) sends various queries to a series of servers to retrieve the specific IP address of the target website you’re trying to access. This process is called DNS name resolution, where the DNS queries pass through various nameservers to figure out the IP address.
Sometimes, the DNS queries fail to retrieve the IP address when you receive the infamous DNS_PROBE_FINISHED_NXDOMAIN error message. Here, NXDOMAIN refers to a non-existent domain. So, the entire error message can be broken down into, “the DNS probe has finished, but the domain name does not exist on the servers.” This is what causes the DNS_PROBE_FINISHED_NXDOMAIN error code.

How to Fix DNS_PROBE_FINISHED_NXDOMAIN error?
Like most error messages you may face with your WordPress website or browser, there are many ways to fix this DNS_PROBE_FINISHED_NXDOMAIN error, too. Since the error code encompasses a host of DNS problems, you have to use deductive reasoning to figure out the best solution.
Here is how to solve the DNS_PROBE_FINISHED_NXDOMAIN message for both Windows and macOS. Follow these steps should resolve the error.
Ensure You Entered the Correct URL
You’d be surprised to know how many times people make typos while typing the URL, especially if the URL is long. So, the first step, as a fail-safe measure, should be to verify the URL. If you are copy-pasting the URL from somewhere else, make sure the entire URL is being copied into the search bar with zero typos.
Even a misplaced space or letter can keep your device from reaching the right DNS servers. This is because, while the URL looks simple for humans, it contains specific strings of code that the DNS translates into IP addresses. If there is a typo, the DNS server might convert it into an incorrect IP address that does not exist at all.

Release and Renew Your IP Address
The second method of solving the DNS_PROBE_FINISHED_NXDOMAIN error code should be to renew your IP address. The reason for this is that the error message is usually a client-side issue, i.e., the error message refers to a problem on your device’s end. Releasing and renewing the IP address on your computer includes flushing your local DNS cache. Here is how to do that in both macOS and Windows.
Windows
Follow these steps to release and renew your IP address in a Windows computer:
1.Open Command Prompt by pressing the Windows logo key and R simultaneously and then type “cmd” in the Run window and press Enter.
2.In the Command Prompt window, type “ipconfig /release” and hit Enter to release your current IP address.
3.Then, type “ipconfig /flushdns” and hit Enter to flush your local DNS cache. You should see a message that says, “Successfully flushed the DNS resolver cache.”
4.Next, type “ipconfig /renew” and hit Enter to renew your IP address.
macOS
Follow the instructions to release and renew the IP address on your Apple computer:
1.Go to Systems Preferences.
2.Click on the network icon and then click on Advanced.
3.Then, click on TCP/IP, followed by Renew DHCP.
Or, you can use this process, too:
1.Go to Utilities.
2.Click on Terminal.
3.Enter the command “dscacheutil -flushcache”.
Doing either of these will renew the IP address in your Apple computer.

Restart DNS Client Service
If you are running a Windows computer, the next step you can do is restart the DNS client services, which are responsible for resolving and caching DNS domain names.
To restart the DNS client service, follow these steps:
1.Press the Windows logo key and R, and type services.msc.
2.Then, scroll to DNS Client, right-click on it, and select Restart.
If your computer is not giving the Restart option, then try this instead:
1.Press the Windows logo key and R, type cmd, and hit Enter to run Command Prompt.
2.Then, enter the following commands:
- net stop dnscache
- Net start dnscache
That’s all you need to do to restart your DNS client services on your Windows computer.

Change DNS Servers
In your computer, the DNS servers are automatically assigned by your local ISP, but you can try changing them to fix DNS PROBE FINISHED NXDOMAIN error code; you can even try temporarily changing the DNS server to public, such as Google or Cloudflare. Here, we will be using Cloudflare’s public DNS, but if you want to use Google, simply replace the DNS server in the following steps. Here’s how to change your DNS servers.
Windows
1.Press Windows logo key and R, type “control panel”, and hit Enter.
2.Navigate to Network and Internet, followed by Network and Sharing Center.
3.Then, click on Change Adapter Settings on the left-hand side.
4.Righ-click on your current connection and click on Properties.
5.Select Internet Protocol Version 4 or IPv6, and then click on Properties.
6.Click on Use the Following DNS Server Addresses.
7.Enter the following in the boxes:
- For IPv4: 1.1.1.1 and 1.0.0.1
- For IPv6: 2606:4700:4700:1111 and 2606:4700:4700:1001
8.Click on Ok, and then restart your browser.
Mac
1.Go to System Preferences.
2.Click on the network icon and then click on Advanced.
3.Click on the DNS tab.
4.Then, add the DNS server addresses, as given below:
- For IPv4: 1.1.1.1 and 1.0.0.1
- For IPv6: 2606:4700:4700:1111 and 2606:4700:4700:1001
Reset Chrome Flags
If none of the above methods works to fix DNS_PROBE_FINISHED_NXDOMAIN error code, you can try to reset Chrome Flags. This is because sometimes, Chrome’s settings may get changed or misconfigured, and resetting Flags being the settings back to default. Here’s how to do that in the Chrome browser:
1.Type “chrome://flags” into the search bar at the top and hit Enter.
2.Then, click on Reset all to default.
3.Then, restart your browser.
We also recommend against using Chrome’s experimental features if you keep seeing connection or DNS errors in your browser. The experimental features are under development in beta testing mode, and not all of them may run smoothly on your device, interrupting the DNS lookup or connection processes.
Disable VPN and Antivirus Software Temporarily
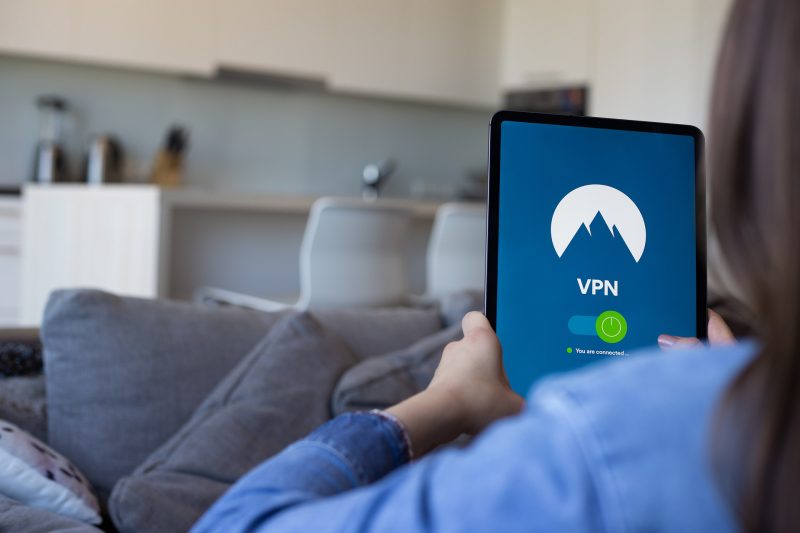
If you are using a VPN or antivirus software, you should also try shutting them down. While these softwares are generally safe to use, slight misconfigurations in them can lead to the DNS_PROBE_FINISHED_NXDOMAIN error code. Such misconfigurations can interfere with your internet connection and DNS queries, and disabling them temporarily is the right approach to see if they are the cause for concern.
Check Your Local Hosts File
Even after disabling the VPN and antivirus software doesn’t solve the problem, you should check your local host files.
Local hosts file in your computer stores manual DNS entries mapped to specific IP addresses. Usually, the DNS entries in the local hosts’ file are only edited if you want to preview your DNS before switching your domain to a new host.
However, there are still various ways the local hosts file may have been edited, causing the DNS_PROBE_FINISHED_NXDOMAIN error code. Here’s how you can check your local hosts’ file in both Windows and macOS.
Windows
Here’s how you can check your local hosts file on your Windows computer:
1.Open up your text editor as an administrator since checking the file requires additional access.
2.Then, click on File and browser to the following location:
- C:\Windows\System32\drivers\etc\
3.Then, click on the hosts’ file and hit Open.
4.Now, verify the information and ensure that the website you are trying to visit is not listed here; remove the website if it is listed here.
macOS
To fix the DNS_PROBE_FINISHED_NXDOMAIN error code by checking your local hosts’ file in your Apple computer, follow these steps:
1.Then, go to Utilities and click on Terminal.
2.In the new window, enter the following command:
- Sudo nano /private/etc/hosts
3.Here, see if your site is listed in the hosts’ file. If it is, edit and remove it.
We even recommend you download Gas Mask, a free app that can be used as a hosts file manager and editor.

Check DNS of Your Domain
If you are still getting the DNS_PROBE_FINISHED_NXDOMAIN error code, then you should now check your domain’s DNS. Essentially, you have to check whether your DNS nameservers are properly applied and pointing to the correct server.
While you can check the nameservers using WHOIS lookup tools, we recommend using the system console since it is more reliable.
Windows
Follow these steps to check the DNS of your domain if you are using a Windows computer:
1.Press Windows and R to open Run, and then type cmd to open Command Prompt.
2.Then, type in the following command:
- Nslookup -type=ns yourdomainname.com
3.The DNS information will show up; ensure it is correct and pointing to the right server.
macOS
If you are using an Apple computer, follow these instructions instead:
1.Open macOS Launchpad by clicking the F4 key.
2.Then type “terminal” and press Enter.
3.Then, enter the following command:
- Dig ns yourdomainname.com
4.You will see the server names under Answer Section; ensure they are pointing correctly.
When you are trying to check nameservers, you may encounter a couple of problems; for instance, your domain may be available for registration, or the nameserver values may not show up at all.
If you are seeing your domain as available, be sure that you have entered the current URL for your website. It may be possible that the tool you are using to check this may be showing outdated information, so try using another WHOIS lookup tool.
If the nameserver value does not show up, it may be because you are checking for less common extensions. Here, verify that the tool you are using supports your domain extension.

Restart Your Computer
Sometimes, the easiest solution is to simply restart your computer. If none of the above solutions solves the DNS_PROBE_FINISHED_NXDOMAIN error code, then you should try turning your computer off and on again.
You’d be surprised to know how many software issues can be solved by simply restarting your computer and router. This is because, over the hours of usage, your computer may have built up a lot of temporary caches that may be interfering with your DNS queries. Restating your computer simply gets rid of this temporary cache.
Check Your Computer for Malware
In rare cases, the DNS_PROBE_FINISHED_NXDOMAIN message may be caused by malware that is infecting your computer. For example, STOP/DJVU ransomware is notorious for modifying the hosts’ file in Windows computers, leading to the error code.
Contact Your Network Provider
Although none of the above-mentioned points rarely fail to solve the DNS_PROBE_FINISHED_NXDOMAIN error code, it can still happen. If that happens with you, it could even be because of your local ISP’s nameserver issue. Hence, if nothing else works, you should try contacting your network provider. Simple troubleshooting on their end can fix this issue within minutes.

Sometimes, you may see the error because the website you are trying to access is blocked in your region; usually, this is the case with pirated movie or shadow site like libgen.is. So, check to see that the website is accessible in your location.
If you still want to access the blocked site, you can try using a VPN to see if it works without showing the DNS_PROBE_FINISHED_NXDOMAIN error code.
Wrapping Up
If you try to visit a WordPress website and are met with the infamous DNS_PROBE_FINISHED_NXDOMAIN message, don’t be worried. The error can be frustrating, but it can be fixed easily. Just follow the instructions listed above should solve your problem.
This method of elimination is effective in most cases. Please spend a few minutes working through them, and your issue will be fixed on time. And finally, to avoid this happening in the future, always clean up your network cache regularly and verify the settings.
Stay tuned to know more about DNS and how to fix common DNS-related errors in Windows and macOS.
- Cause of WordPress 404 Page Not Found Error and What Can You Do About It
- 502 Bad Gateway Error: What Is It and How to Fix It
- How to Fix ‘ERR_SSL_VERSION_OR_CIPHER_MISMATCH’
- How to Fix the uploaded file exceeds the upload_max_filesize directive in php.ini Error in WordPress
- Conversion Rate Optimisation for Your Website
You may also be interested in…
- What does SEO Stand for? Read more here
- When and Why Should You Clear WordPress Cache
- Long-Tail vs Short-Tail Keywords | What are They and How to Use Them To Improve Your SEO?


